

In this easy and quick tutorial article, we will introduce you to epoxy resin in Palestine and the art it contains. Before starting this profitable project, you will learn what resin is and the most important points you should pay attention to when working with resin.
You will also get a general idea about the important and main products, and how to distinguish between different epoxy resin systems in the market, to start in the resin field from today.
What is epoxy resin?
Epoxy is a liquid chemical system consisting of two main materials which we refer to as resin and hardener (curing agent) in our field.
When the two materials (resin + hardener) are mixed, the final result is a highly transparent, clear, and solid piece like crystal, which we can use in various types of arts such as wood tables, making accessories, decorations, mosaics, model making, and many unlimited artistic ideas.
Resin art in Palestine

Globally, resin art started in the United States of America, Canada, and Australia. As for Palestine, resin art has been known since 2016 through our company, and we proudly introduced resin art in Palestine to all our customers with free courses for all Palestinian areas, whether in the West Bank or in the Israeli Areas, through our German expertise that has lasted 10 years to this day.
If you love experiments, art, and learning things, you will enjoy working with resin. You can create amazing art pieces depending on the field you want to start in, such as making river tables, coasters and decorations, home decor, or preserving a physical memory inside the material forever. You can enhance the beauty of any canvas painting projects and make them look three-dimensional, for example!
The basic materials you need to start with resin
Below is a short list of the most important basic products you need to start your artistic project with resin and make money! All materials are available with delivery service to all areas.
- Raw epoxy resin materials
- Sensitive electronic scale
- Flame torch
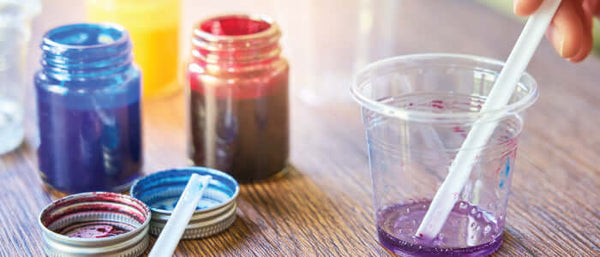
- Mixing cups
- Colors and pigments
- silicone molds
- Resin and hardener are the basis of the work; the two materials are mixed together in specific ratios depending on the product.
- Sensitive scale Epoxy resin is a very beautiful but sensitive material and therefore the two materials must be mixed in specific ratios to achieve a shiny and high-quality transparent product
- Colors and pigments Why not? If you want to add colors and life to your handmade pieces!
- Flame torch is used to remove bubbles, i.e., invisible and unwanted particles from your artwork.
How to work with epoxy resin?

Working with epoxy resin is not as complicated as it is promoted, but it requires special care when working with it.
For Woodberg's epoxy resin products, specific mixing ratios depend on the product you purchased through our store.
Mixing ratios for Ultra Clear epoxy resin 1500 ml and 750 ml are: For every 100 ml resin, add 50 ml hardener (the hardener for this product must be half the resin quantity)
Example: 70 ml resin to which we add 35 ml hardener (mixing ratios for Ultra Clear epoxy resin)
Mixing ratios for Crystal Art epoxy resin 1400 ml: For every 100 ml resin, add 40 ml hardener (the hardener for this product must be 40% of the resin quantity)
Example: 70 ml resin to which we add 28 ml hardener (mixing ratios for Ultra Clear epoxy resin)
The quantities in the above examples may vary depending on the size of the pieces you want to work with and the different sizes of the molds.
Ratios and quantities must be added precisely, as they work best with our products and for this reason a sensitive digital scale is needed.
What happens if the mixing ratios are incorrect?

Adding more hardener to resin will speed up the curing process. But it will re-ignite heating and may cause your project to crack, break, or change colors.
Adding more resin to hardener will slow down the curing process, and it may last more than 3-4 days, or may never harden.
For this reason, we recommend using the recommended mixing ratios for each product.
Product (A) resin and product (B) hardener.. The material must be mixed well for 3-5 minutes before pouring into any mold.
Resin work area

- Work with epoxy resin should always be indoors.
- A dust-free, clean, and well-ventilated room.
- Room temperature 20-23 °C. (Very important, explained below)
- Wear gloves when working with resin; our product is environmentally friendly but may stick to your hands.
- If you are working on large projects, such as tables and large pieces, make sure to wear work clothes.
Safety measures when working with resin

Resin is a sticky viscous material that hardens completely at room temperature in a certain time. Therefore, care must be taken to protect your furniture and clothes from resin stains. On the other hand, precautions must also be taken to protect your health.
Even if you use resin certified as non-toxic and harmless, resin can cause skin irritation if it comes into contact with the skin.
Therefore, it is important to wear disposable nitrile gloves and long-sleeved clothing. Additionally, you should refrain from eating and drinking in the immediate vicinity of the resin.
Smoking should also be avoided, as synthetic resin is partially flammable. Additionally, it is recommended to use a protective respiratory mask when heating synthetic paint/resin.
How to prevent the resin from becoming too hot?

Mix only the amount of resin you need for your work.
The warmer the room temperature, the faster the resin starts to "boil".
If you notice that the epoxy is hard and very hot in the cup, you should pour it onto paper. Because you cannot process it anyway and it can cool down again. On hot days, I recommend making the resin in the morning or moving it to a cool room.
Increasing mica colors in resin beyond the allowed ratio may accelerate the reaction process.
What to do against air bubbles?

Air bubbles in resin cannot be avoided. Stir the mixture slowly and heat the resin with a flame torch.
Letting the material rest after mixing also helps to get rid of bubbles, so bubbles should not be a problem.
The heat will cause bubbles to rise to the surface and burst. Regularly heat the resin on the top surface using a hot air dryer or preferably a butane flame torch.
Keep the heat source about 10 cm away from the epoxy art and move the flame torch quickly over the panel.
Otherwise, the resin will start to boil and clump. If the resin is colored white, this can be noticed by the fact that it turns yellow. If this happens to you, you should remove the clumped resin from the surface and pour it again.
Resin curing time (drying)

The drying time depends on room temperature and the type of resin used. When using our epoxy resin products at a room temperature of 22°C, you have about 15-20 minutes of working time before drying begins.
The resin hardens after 24 hours, and we recommend not working again with your piece until 24 hours have passed.
Summary
As you can see, making a piece of epoxy resin requires a lot of preparation. But if you hold a successful resin artwork in your hands, you will see the beauty of working with these magical materials.
For beginners, I can definitely recommend attending the resin course. There you will learn to understand the technique from A to Z - with all its specifics and precautions. You will be accompanied step by step through the individual stages: from preparation and design to cleaning and post-processing.
We offer free 30-minute courses for all our customers when they visit our workshop located in Ramallah city (Al-Masaif neighborhood, Energy Authority Street).
Additionally, there is a simple tutorial video explaining the basics through the link below:
https://www.youtube.com/watch?v=Nqj5szsINPE
Enjoy the resin experience!

22 comments
أم محمد سمارة
جزاكم اللّه خيراً
عبد المجيد عبد الواحد
نفسي اتعلم الايبوكسي اني اشتغل فيه
عبد المجيد عبد الواحد
نفسي اتعلم الايبوكسي اني اشتغل فيه
ايناس طه
السلام عليكم هل يوجد دورات مهتمة بتعلم فن الرايزن من الاساس حتى …
نسريم كُلاب
ابحث عن دوره لتعليم فن الرزين
Leave a comment
All comments are subject to moderation before being published.
This site is protected by hCaptcha and the hCaptcha Privacy Policy and Terms of Service apply.