
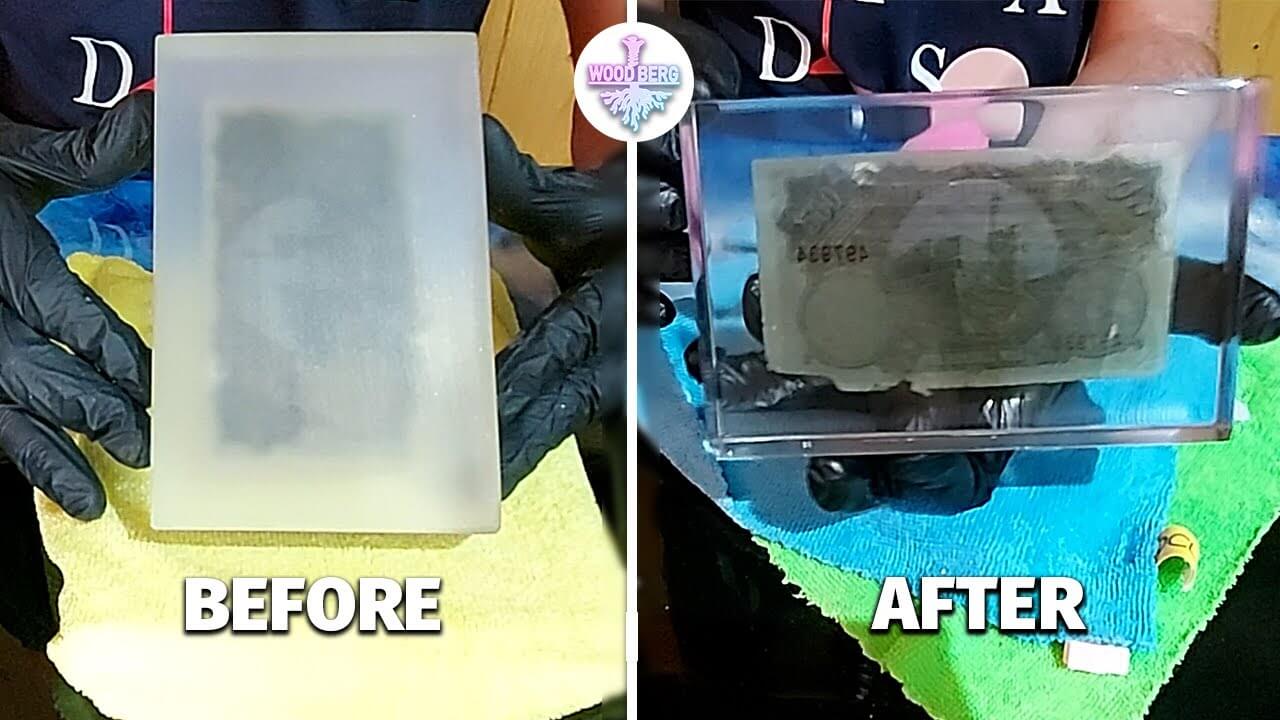
Have you ever made a piece of Epoxy resin and noticed it has some defects after removing it from the Mold? Like not having a clear and shiny surface? Or not having a transparent matte surface with some defects?
Before we explain how to fix this problem, you should know that this often happens when using cheap silicone molds not made from high-quality silicones, or using molds not intended for resin, or due to some mixing ratio errors or winter and cold effects that we discussed how to fix in another article.
Fortunately, there are very easy and simple steps to fix any defects, called resin finishing using sandpaper, polish, and wax.
To ensure your resin gives the final crystal clear and shiny transparency.
What do you need at the beginning?
Preparation:
1. Prepare clean water in a bowl.
2. Soak the sandpaper in a bowl of water for 20 minutes before use.
3. Dip the resin piece in clean water for a few minutes, to prepare it for sanding.
4. Get a piece of cloth/sponge.
Steps:
Water
Add water to your handmade piece; water helps remove the granular paper particles removed from the sandpaper and protects the Epoxy surface from scratches that will occur in our next step.
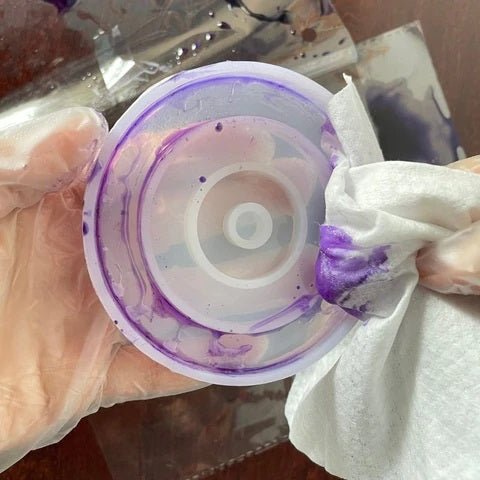
Sanding process
Sanding Epoxy resin begins with wet sandpaper previously soaked in water. We recommend using sandpaper from P Grit 500 to P Grit 2500.
Starting from P Grit 500, sanding is done carefully with smooth circular motions either manually or using an orbital sanding tool.
At the end of each sanding process, we make sure to clean the piece with clean water from dust and particles present in the specified sandpaper, then wipe the remainder with a cloth, then reapply clean water to move to the next sandpaper number.. 600-800-1000 etc...
We continue repeating the above steps until we finish the sanding process using P Grit 2500.
💡 Sandpaper P Grit numbers indicate how hard or soft the paper is; the higher the number, the softer it is. Example: 2500 is the softest number, 500 is the roughest number.
Now we clean our piece again and prepare it to add polish to the piece
Polish stage
After covering the piece with polish, we wipe it well repeatedly with cotton, cloth, or sponge.
💡 Although the polishing process with polish is very simple, you need to be patient with it and take your time to polish the piece and make sure to remove the product completely from the piece.
💡 Polishing helps remove surface scratches, swirls, oxidation, and minor defects.
💡 You can polish manually using a sponge or using a rotary tool (Dremel) for best results, especially for resin-made jewelry and coasters.
Wax stage
We cover the entire surface of the piece with the wax product and leave it for two minutes to dry.
Using a new clean cloth, (do not use the same cloth you used for polishing with polish), we start wiping and polishing the wax. Although it may seem that you have removed all the wax compound, a thin protective layer is left behind, which is what we are looking for..
💡 Wax helps give a shiny and transparent final look, in addition to protecting your piece from sunlight, dust, and other chemicals.
Last but not least, we recommend using Bligh oil which adds a high shine to our custom piece that also has a fresh orange scent!
Thank you again for the tuning, I hope this is helpful and clear.
Please leave any questions or comments below!

Leave a comment
All comments are subject to moderation before being published.
This site is protected by hCaptcha and the hCaptcha Privacy Policy and Terms of Service apply.